Quickstart with Bolt for JavaScript
This quickstart guide aims to help you get a Slack app using Bolt for JavaScript up and running as soon as possible!
When complete, you'll have a local environment configured with a customized app running that responds to a simple greeting.
In search of the complete guide to building an app from scratch? Check out the building an app guide.
Prerequisites
A few tools are needed for the following steps. We recommend using the Slack CLI for the smoothest experience, but other options remain available.
- Slack CLI
- Terminal
Install the latest version of the Slack CLI to get started:
Then confirm a successful installation with the following command:
$ slack version
An authenticated login is also required if this hasn't been done before:
$ slack login
A workspace where development can happen is also needed.
We recommend using developer sandboxes to avoid disruptions where real work gets done.
Creating a project
With the toolchain configured, it's time to set up a new Bolt project. This contains the code that handles logic for your app.
If you don’t already have a project, let’s create a new one!
- Slack CLI
- Terminal
A starter template can be used to start with project scaffolding:
$ slack create first-bolt-app --template slack-samples/bolt-js-getting-started-app
$ cd first-bolt-app
After a project is created you'll have a package.json file for app dependencies and a .slack directory for Slack CLI configuration.
A few other files exist too, but we'll visit these later.
A starter template can be cloned to start with project scaffolding:
$ git clone https://github.com/slack-samples/bolt-js-getting-started-app first-bolt-app
$ cd first-bolt-app
$ npm install
Outlines of a project are taking shape, so we can move on to running the app!
Running the app
Before you can start developing with Bolt, you will want a running Slack app.
- Slack CLI
- Browser
The getting started app template contains a manifest.json file with details about an app that we will use to get started. Use the following command and select "Create a new app" to install the app to the team of choice:
$ slack run
...
[INFO]  bolt-app ⚡️ Bolt app is running!
With the app running, you can test it out with the following steps in Slack:
- Open a direct message with your app or invite the bot
@first-bolt-app (local)to a public channel. - Send "hello" to the current conversation and wait for a response.
- Click the attached button labelled "Click Me" to post another reply.
After confirming the app responds, celebrate, then interrupt the process by pressing CTRL+C in the terminal to stop your app from running.
Navigate to your list of apps and create a new Slack app using the "from a manifest" option:
- Select the workspace to develop your app in.
- Copy and paste the
manifest.jsonfile contents to create your app. - Confirm the app features and click "Create".
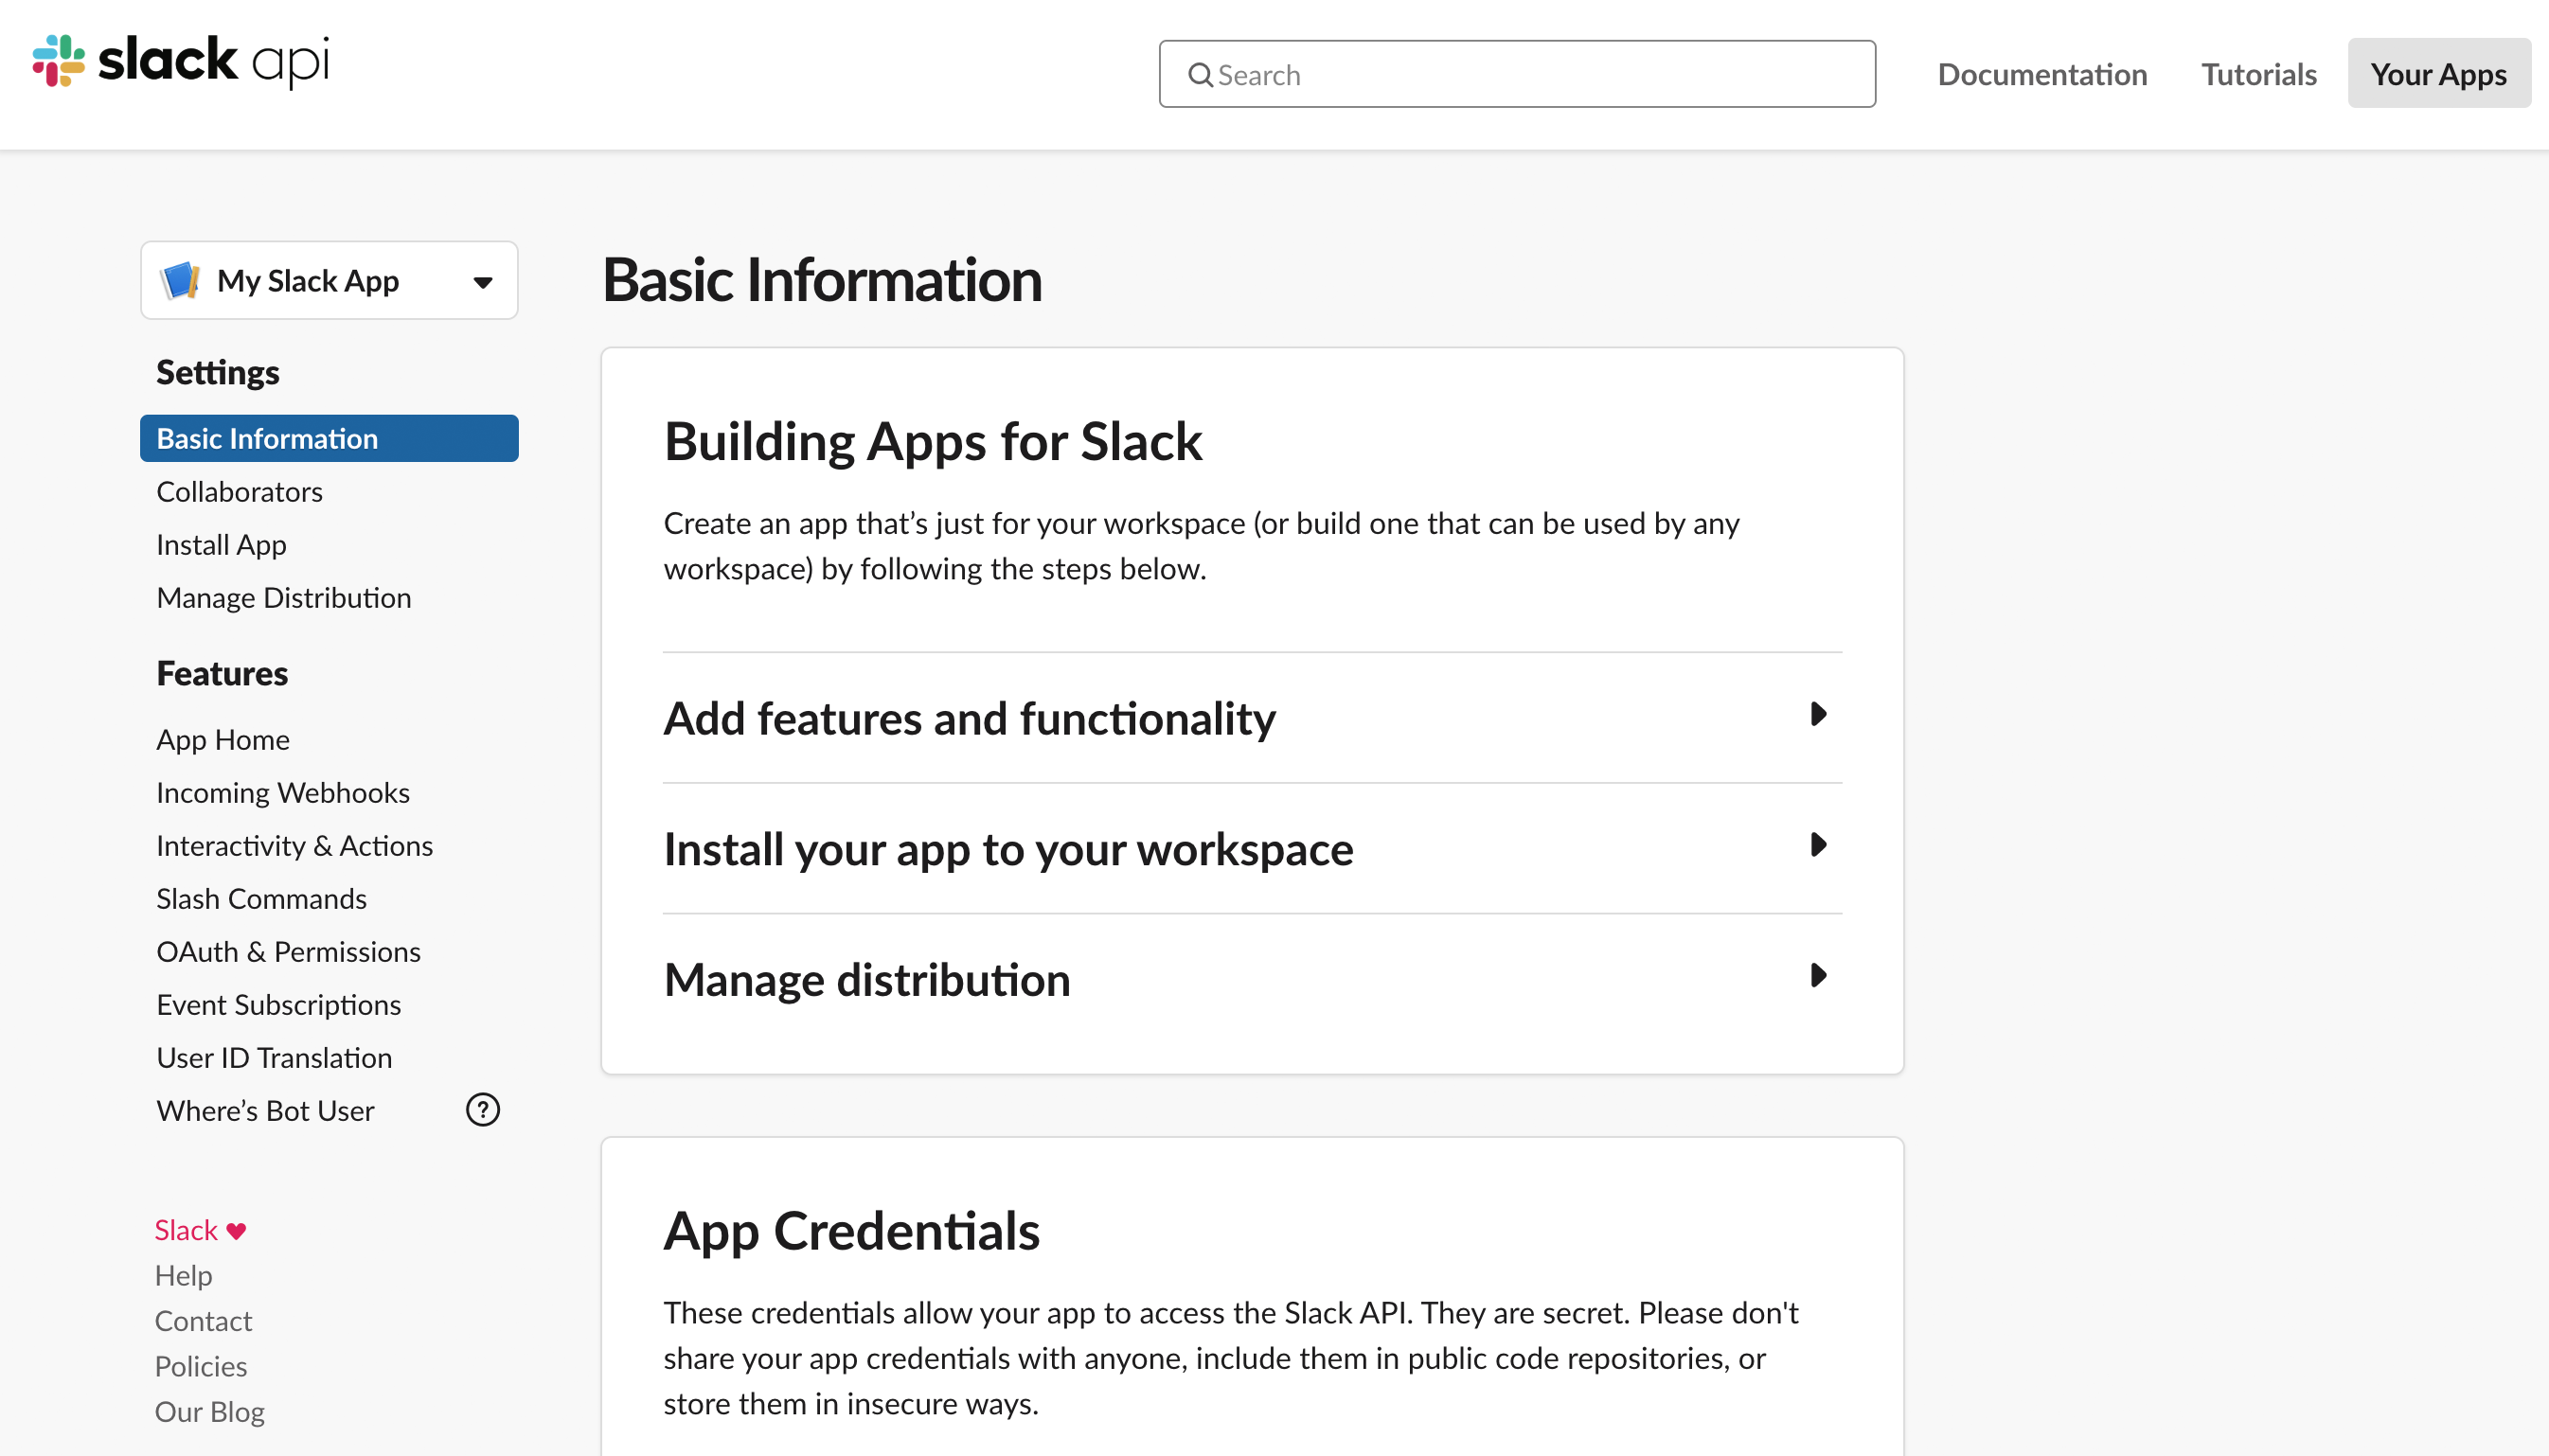
You'll then land on your app's Basic Information page, which is an overview of your app and which contains important credentials:

To listen for events happening in Slack (such as a new posted message) without opening a port or exposing an endpoint, we will use Socket Mode. This connection requires a specific app token:
- On the Basic Information page, scroll to the App-Level Tokens section and click Generate Token and Scopes.
- Name the token "Development" or something similar and add the
connections:writescope, then click Generate. - Save the generated
xapptoken as an environment variable within your project:
$ export SLACK_APP_TOKEN=xapp-1-A0123456789-example
The above command works on Linux and macOS but similar commands are available on Windows.
Treat your tokens like a password and keep it safe. Your app uses these to retrieve and send information to Slack.
A bot token is also needed to interact with the Web API methods as your app's bot user. We can gather this as follows:
- Navigate to the OAuth & Permissions on the left sidebar and install your app to your workspace to generate a token.
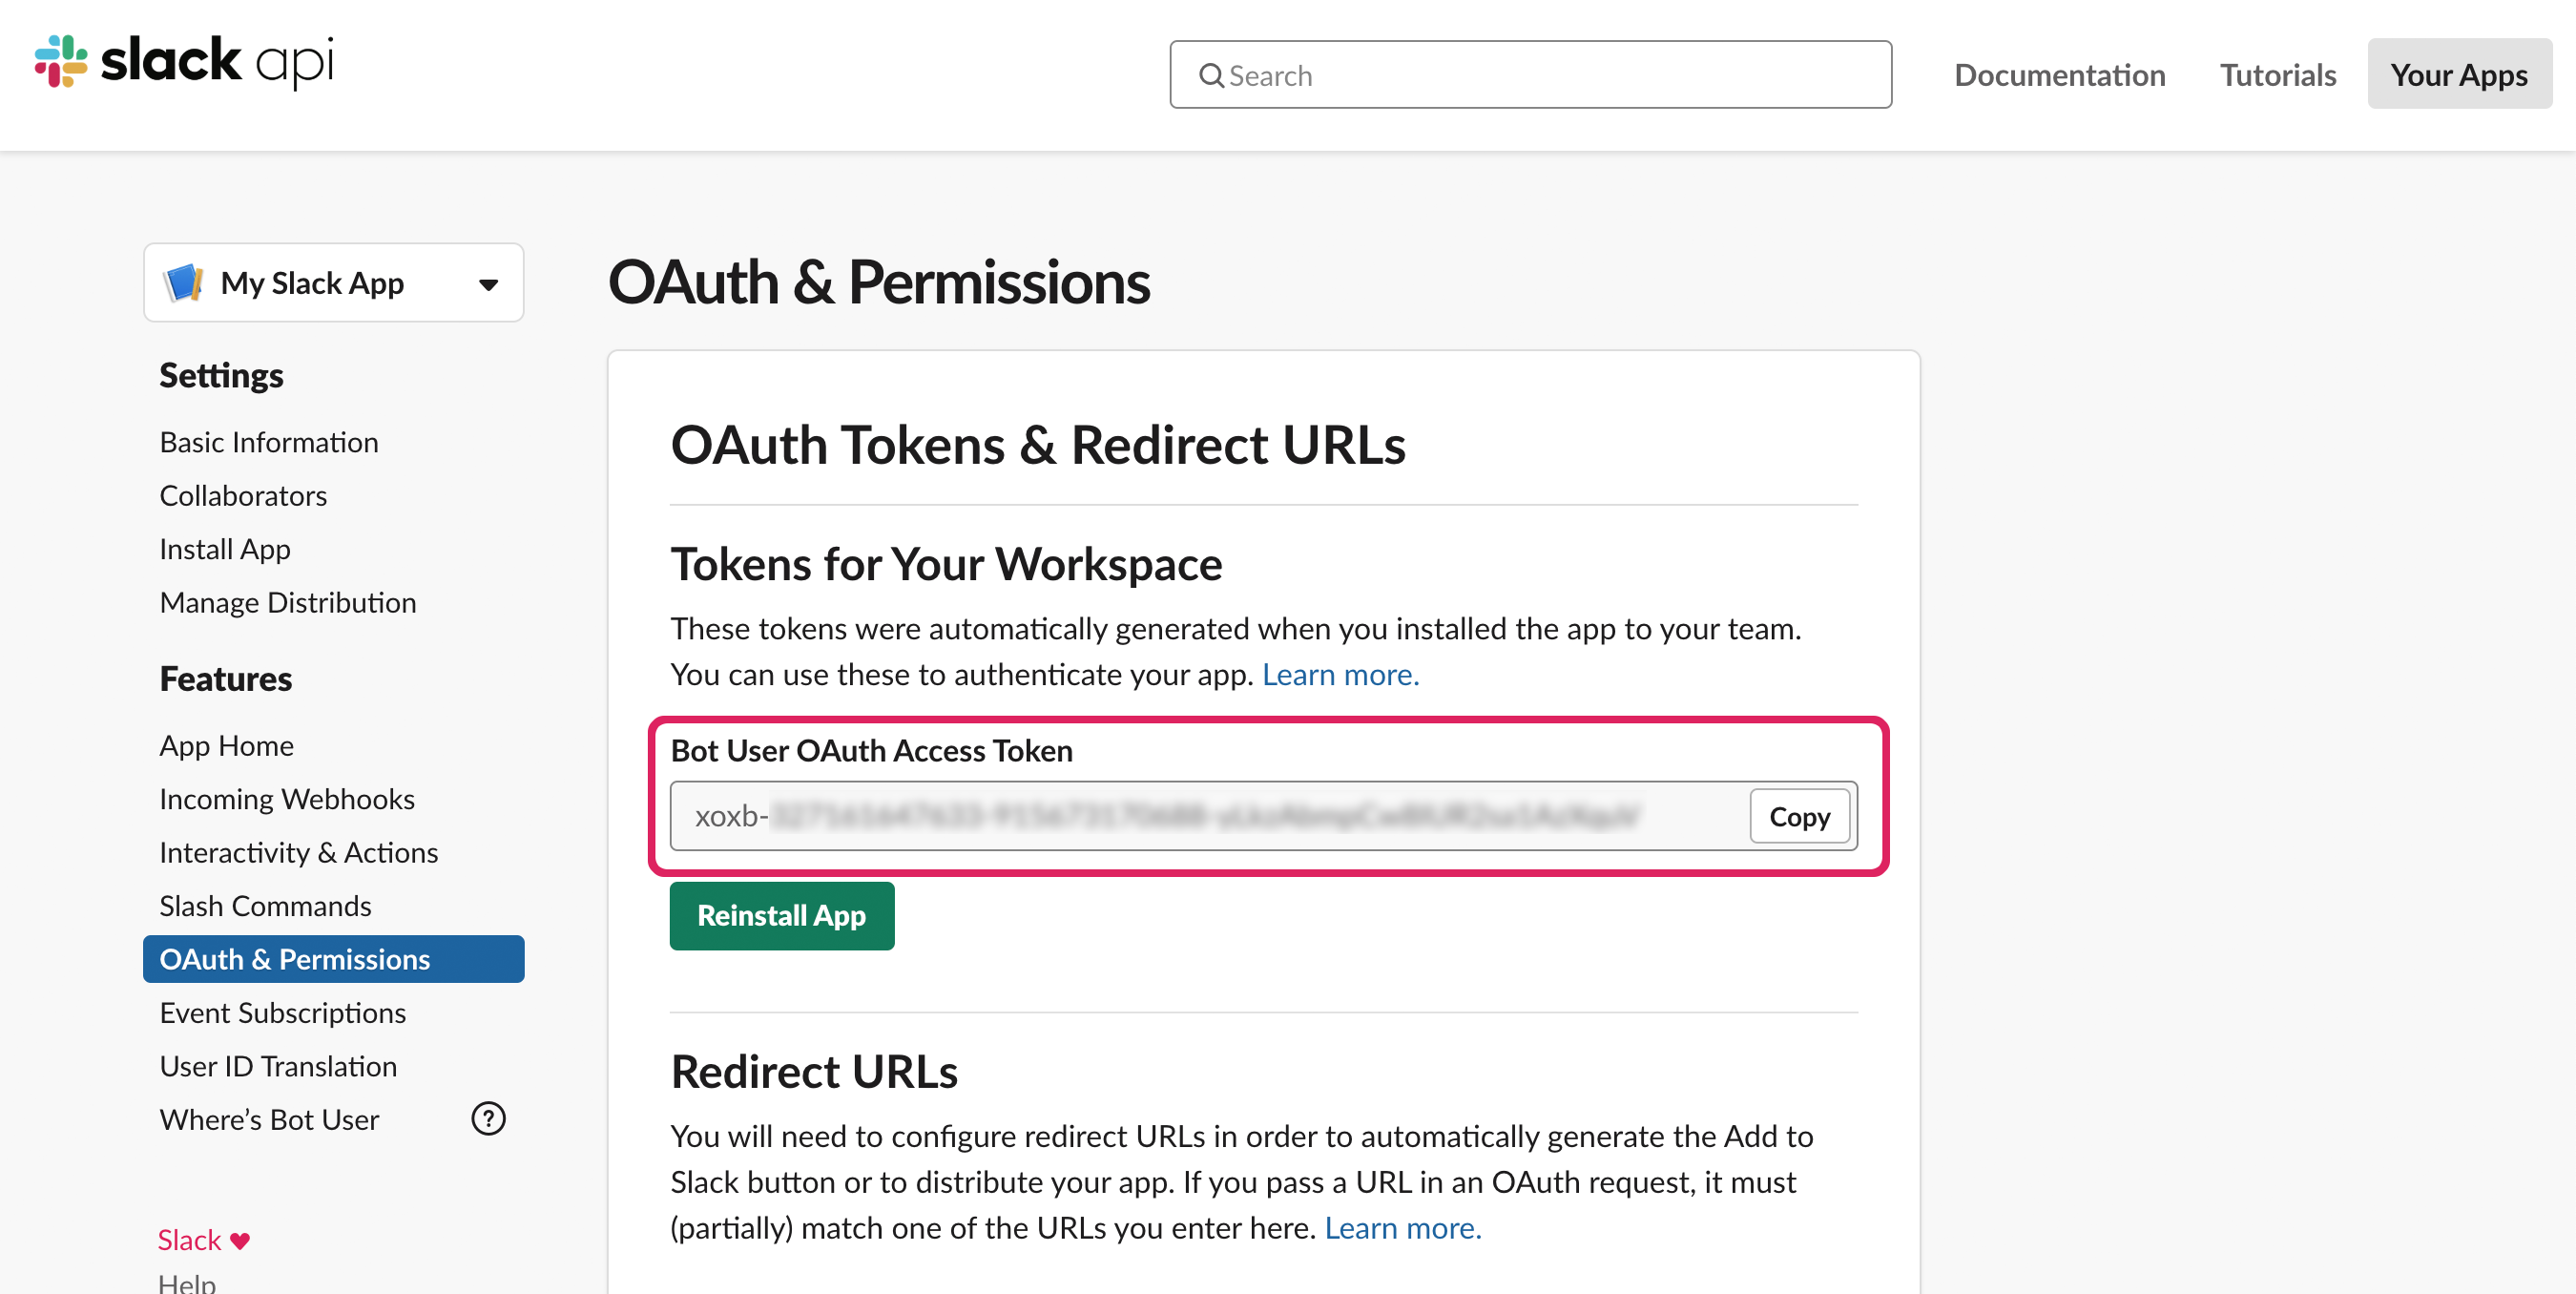
- After authorizing the installation, you'll return to the OAuth & Permissions page and find a Bot User OAuth Token:

- Copy the bot token beginning with
xoxbfrom the OAuth & Permissions page and then store it in a new environment variable:
$ export SLACK_BOT_TOKEN=xoxb-example
After saving tokens for the app you created, it is time to run it:
$ npm run start
...
[INFO]  bolt-app ⚡️ Bolt app is running!
With the app running, you can test it out with the following steps in Slack:
- Open a direct message with your app or invite the bot
@BoltAppto a public channel. - Send "hello" to the current conversation and wait for a response.
- Click the attached button labelled "Click Me" to post another reply.
After confirming the app responds, celebrate, then interrupt the process by pressing CTRL+C in the terminal to stop your app from running.
Updating the app
At this point, you've successfully run the getting started Bolt for JavaScript app!
The defaults included leave opportunities abound, so to personalize this app let's now edit the code to respond with a kind farewell.
Responding to a farewell
Chat is a common thing apps do and responding to various types of messages can make conversations more interesting.
Using an editor of choice, open the app.js file and add the following message listener after the "hello" handler:
app.message('goodbye', async ({ say }) => {
  const responses = ['Adios', 'Au revoir', 'Farewell'];
  const parting = responses[Math.floor(Math.random() * responses.length)];
  await say(`${parting}!`);
});
Once the file is updated, save the changes and then we'll make sure those changes are being used.
- Slack CLI
- Terminal
Run the following command and select the app created earlier to start, or restart, your app with the latest changes:
$ slack run
...
[INFO]  bolt-app ⚡️ Bolt app is running!
After finding the above output appears, open Slack to perform these steps:
- Return to the direct message or public channel with your bot.
- Send "goodbye" to the conversation.
- Receive a parting response from before and repeat "goodbye" to find another one.
Your app can be stopped again by pressing CTRL+C in the terminal to end these chats.
Run the following command to start, or restart, your app with the latest changes:
$ npm run start
...
[INFO]  bolt-app ⚡️ Bolt app is running!
After finding the above output appears, open Slack to perform these steps:
- Return to the direct message or public channel with your bot.
- Send "goodbye" to the conversation.
- Receive a parting response from before and repeat "goodbye" to find another one.
Your app can be stopped again by pressing CTRL+C in the terminal to end these chats.
Customizing app settings
The created app will have some placeholder values and a small set of scopes to start, but we recommend exploring the customizations possible on app settings.
- Slack CLI
- Browser
Open app settings for your app with the following command:
$ slack app settings
This will open the following page in a web browser:

Browse to https://api.slack.com/apps and select your app "Getting Started Bolt App" from the list.
This will open the following page:

On these pages you're free to make changes such as updating your app icon, configuring app features, and perhaps even distributing your app!
Next steps
Congrats once more on getting up and running with this quick start.
Follow along with the steps that went into making this app on the building an app guide for an educational overview.
You can now continue customizing your app with various features to make it right for whatever job's at hand. Here are some ideas about what to explore next:
- Explore the different events your bot can listen to with the
eventmethod. All of the events are listed on the API docs site. - Bolt allows you to call Web API methods with the client attached to your app. There are over 200 methods on the API docs site.
- Learn more about the different token types and authentication setups. Your app might need different tokens depending on the actions you want to perform or for installations to multiple workspaces.
- Receive events using HTTP for various deployment methods, such as deploying to Heroku or AWS Lambda.
- Read on app design and compose fancy messages with blocks using Block Kit Builder to prototype messages.