Custom steps for JIRA
In this tutorial, you'll learn how to configure custom steps for use with JIRA. Here's what we'll do with this sample app:
- Create your app from an app manifest and clone a starter template
- Set up and run your local project
- Create a workflow with a custom step using Workflow Builder
- Create an issue in JIRA using your custom step
Prerequisites
Before getting started, you will need the following:
- a development workspace where you have permissions to install apps. If you don’t have a workspace, go ahead and set that up now—you can go here to create one, or you can join the Developer Program and provision a sandbox with access to all Slack features for free.
- a development environment with Python 3.6 or later.
Skip to the code If you'd rather skip the tutorial and just head straight to the code, you can use our Bolt for Python JIRA functions sample as a template.
Creating your app
- Navigate to the app creation page and select From a manifest.
- Select the workspace you want to install the application in, then click Next.
- Copy the contents of the
manifest.jsonfile below into the text box that says Paste your manifest code here (within the JSON tab), then click Next:
loading...
- Review the configuration and click Create.
- You're now in your app configuration's Basic Information page. Click Install App, then Install to your-workspace-name, then Allow on the screen that follows.
Obtaining and storing your environment variables
Before you'll be able to successfully run the app, you'll need to obtain and set some environment variables.
- Once you have installed the app to your workspace, copy the Bot User OAuth Token from the Install App page. You will store this in your environment as
SLACK_BOT_TOKEN(we'll get to that next). - Navigate to Basic Information and in the App-Level Tokens section , click Generate Token and Scopes. Add the
connections:writescope, name the token, and click Generate. Copy this token. You will store this in your environment asSLACK_APP_TOKEN. - Follow these instructions to create an external app link and to generate its redirect URL (the base of which will be stored as your APP_BASE_URL variable below), client ID, and client secret.
- Run the following commands in your terminal to store your environment variables, client ID, and client secret.
- You'll also need to know your team ID (found by opening your Slack instance in a web browser and copying the value within the link that starts with the letter T) and your app ID (found under Basic Information).
For macOS
export SLACK_BOT_TOKEN=<your-bot-token>
export SLACK_APP_TOKEN=<your-app-token>
export JIRA_CLIENT_ID=<client-id>
export JIRA_CLIENT_SECRET=<client-secret>
For Windows
set SLACK_BOT_TOKEN=<your-bot-token>
set SLACK_APP_TOKEN=<your-app-token>
set JIRA_CLIENT_ID=<client-id>
set JIRA_CLIENT_SECRET=<client-secret>
Setting up and running your local project
Clone the starter template onto your machine by running the following command:
git clone https://github.com/slack-samples/bolt-python-jira-functions.git
Change into the new project directory:
cd bolt-python-jira-functions
Start your Python virtual environment:
- For macOS
- For Windows
python3 -m venv .venv
source .venv/bin/activate
py -m venv .venv
.venv\Scripts\activate
Install the required dependencies:
pip install -r requirements.txt
Rename the .example.env file to .env and replace the values for each of the variables listed in the file:
JIRA_BASE_URL=https://your-jira-instance.com
SECRET_HEADER_KEY=Your-Header
SECRET_HEADER_VALUE=abc123
JIRA_CLIENT_ID=abc123
JIRA_CLIENT_SECRET=abc123
APP_BASE_URL=https://1234-123-123-12.ngrok-free.app
APP_HOME_PAGE_URL=slack://app?team=YOUR_TEAM_ID&id=YOUR_APP_ID&tab=home
You could also store the values for your SLACK_BOT_TOKEN and SLACK_APP_TOKEN here.
Start your local server:
python app.py
If your app is up and running, you'll see a message noting that the app is starting to receive messages from a new connection.
Setting up your workflow in Workflow Builder
- Within your development workspace, open Workflow Builder by clicking your workspace name and then selecting Tools > Workflow Builder.
- Select New Workflow > Build Workflow.
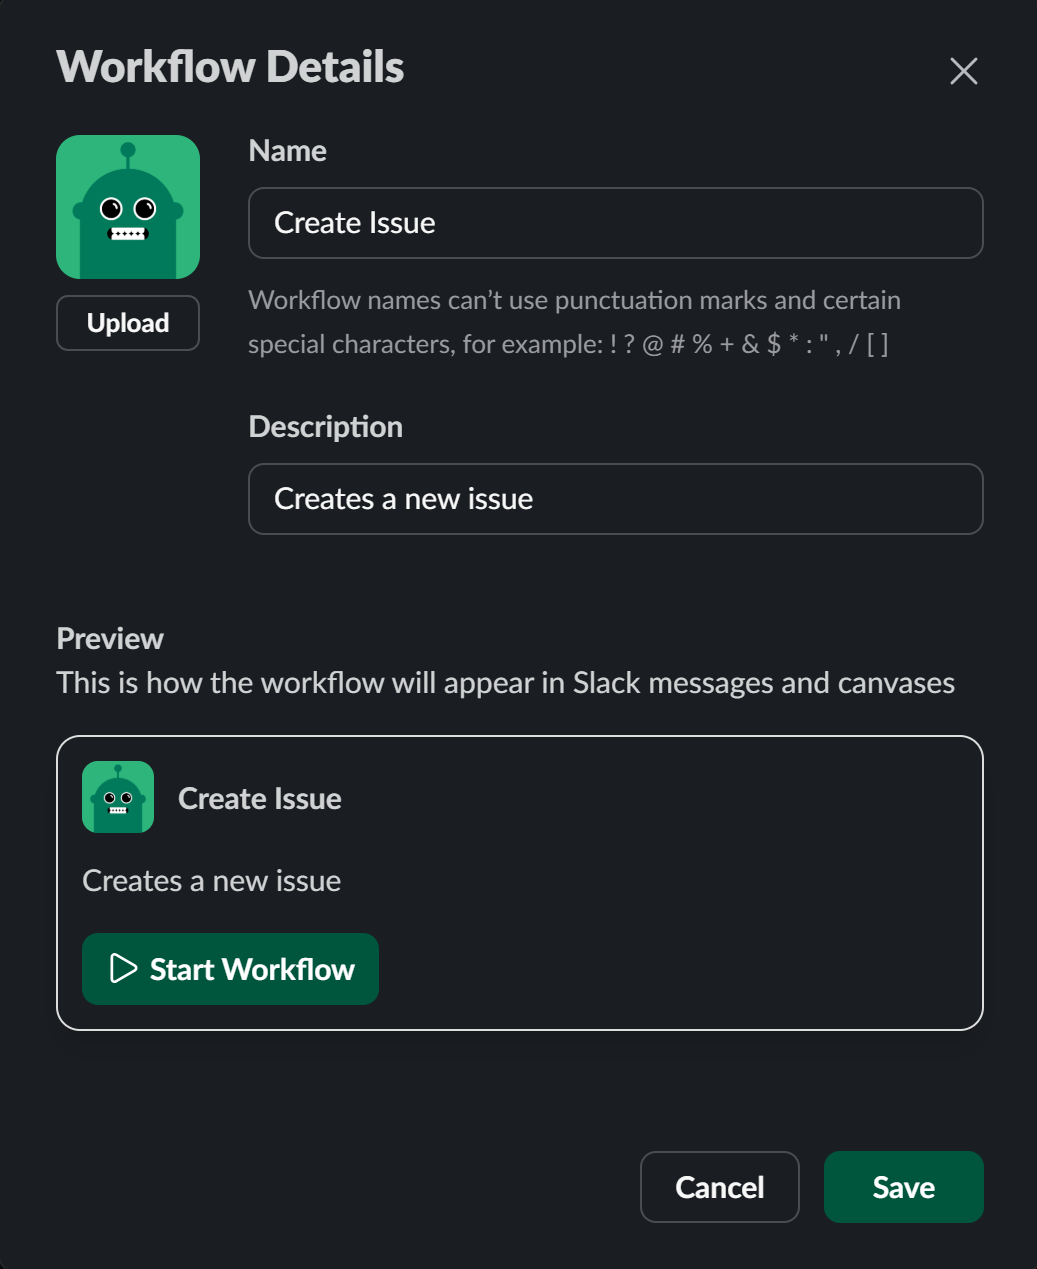
- Click Untitled Workflow at the top of the pane to rename your workflow. We'll call it Create Issue. For the description, enter Creates a new issue, then click Save.
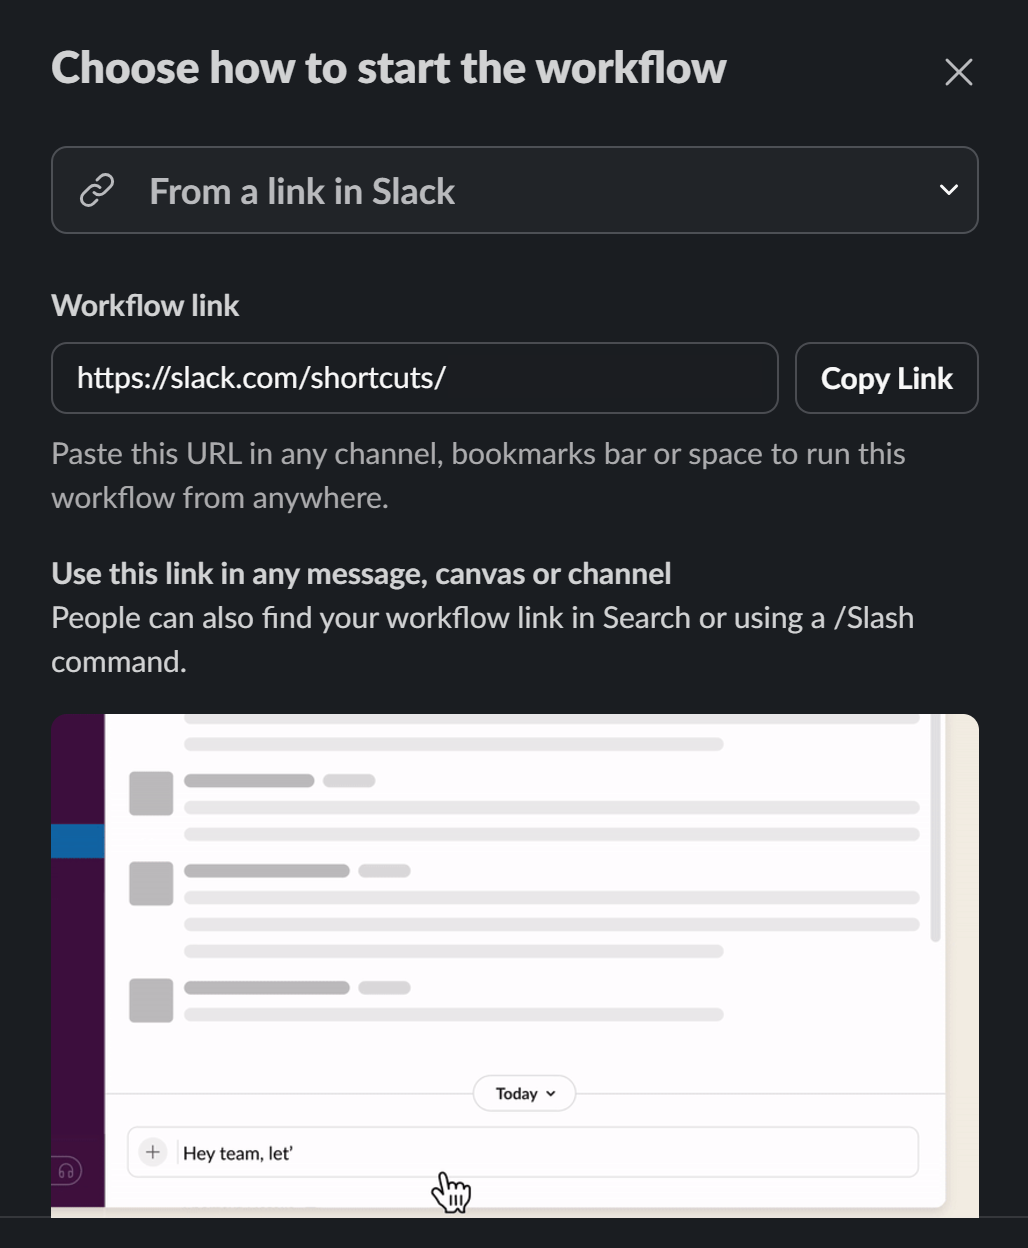
- Select Choose an event under Start the workflow..., and then select From a link in Slack. Click Continue.
-
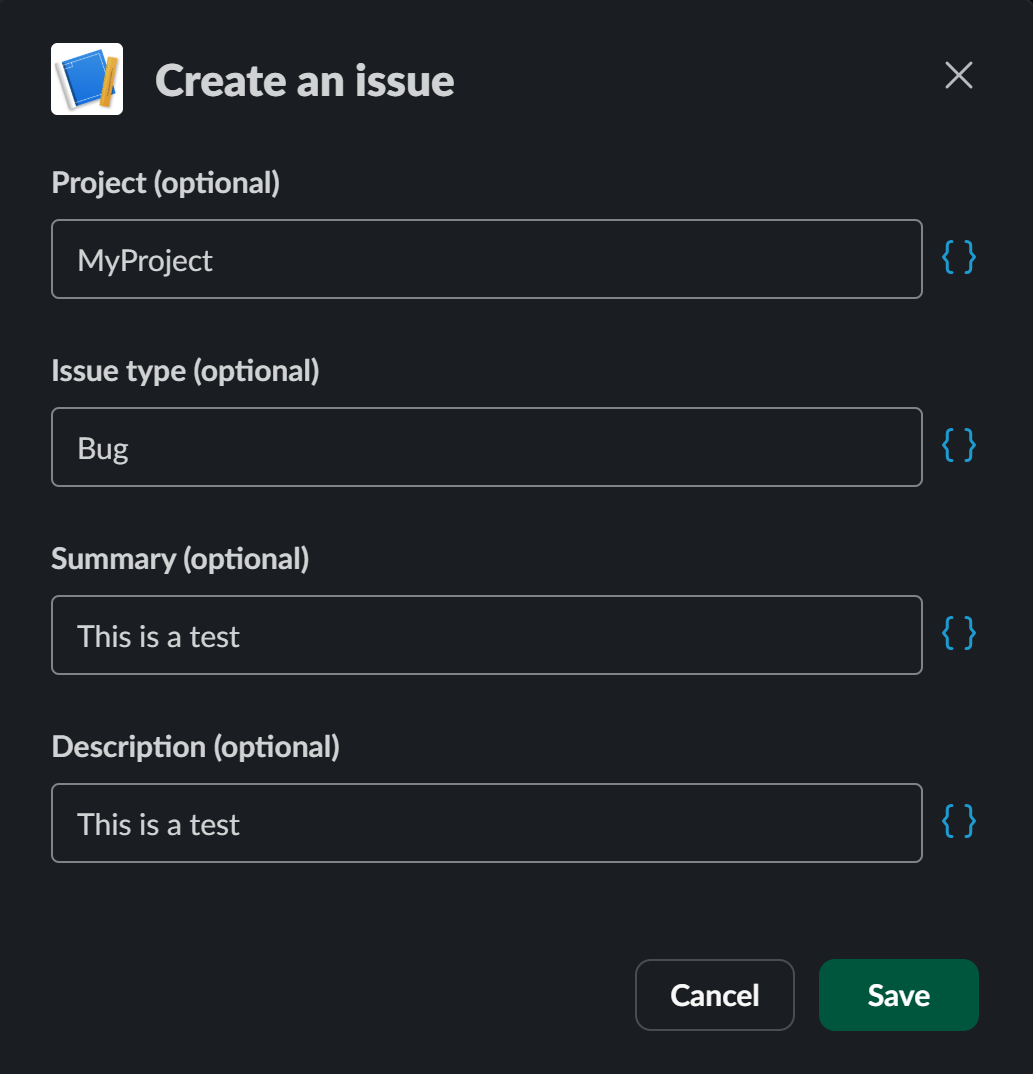
Under Then, do these things click Add steps to add the custom step. Your custom step will be the function defined in the
create_issue.pyfile.Scroll down to the bottom of the list on the right-hand pane and select Custom, then BoltPy Jira Functions > Create an issue. Enter the project details, issue type (optional), summary (optional), and description (optional). Click Save.
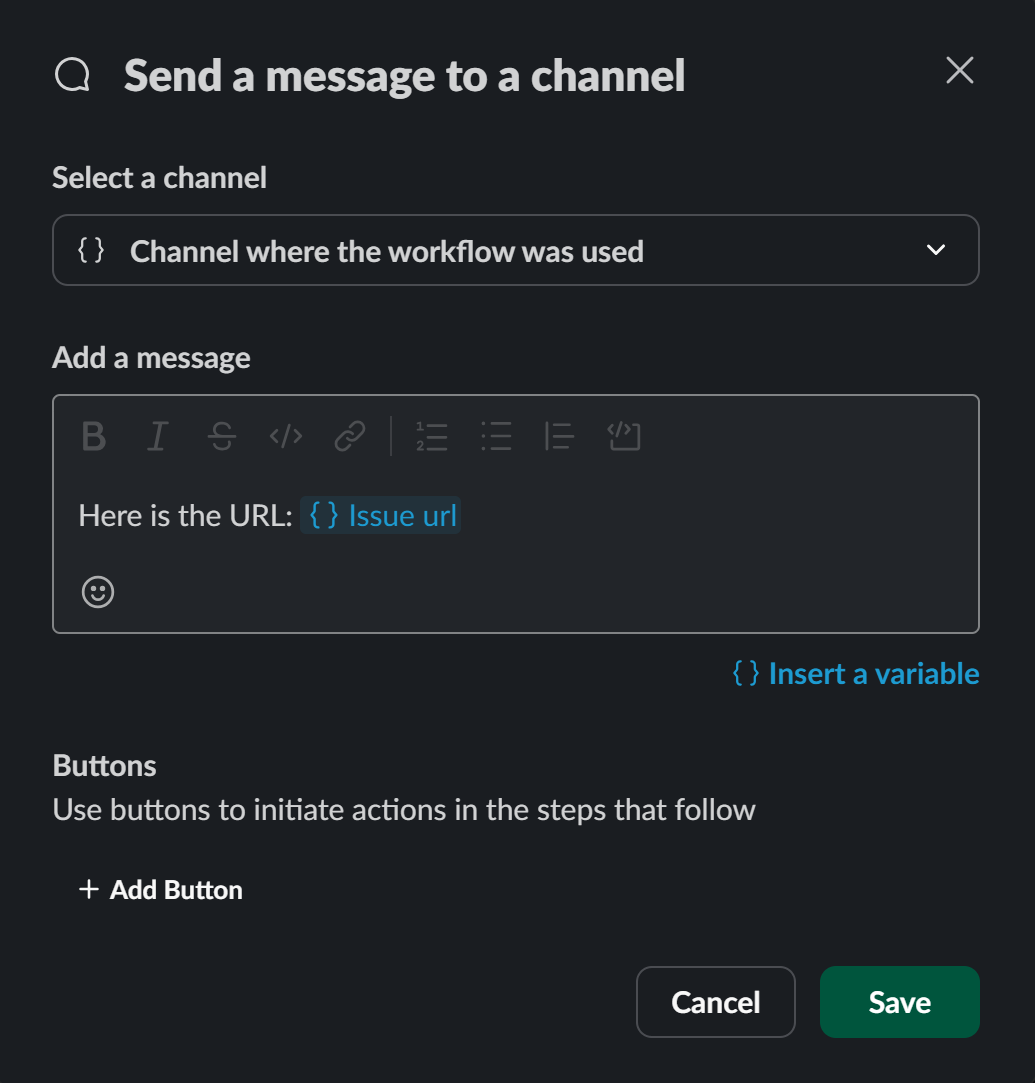
- Add another step and select Messages > Send a message to a channel. Select Channel where the workflow was used from the drop-down list and then select Insert a variable and Issue url. Click Save.
- Click Publish to make the workflow available to your workspace.
Running your app
- Copy your workflow link.
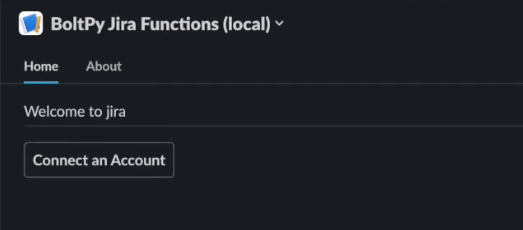
- Navigate to your app's home tab and click Connect an Account to connect your JIRA account to the app.
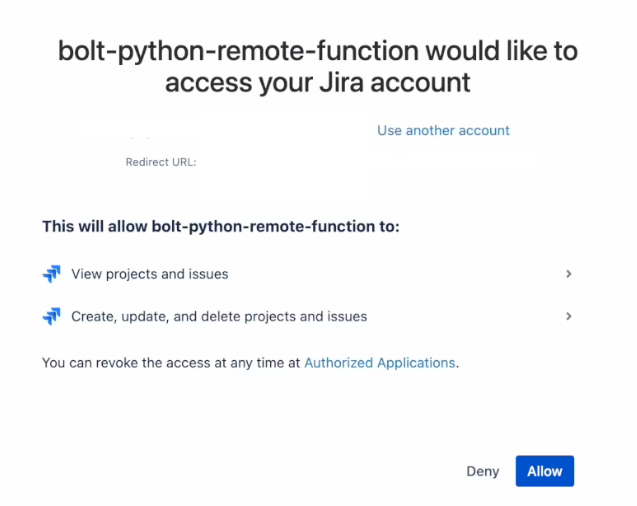
- Click Allow on the screen that appears.
- In any channel, post the workflow link you copied.
- Click Start Workflow and observe as the link to a new JIRA ticket is posted in the channel. Click the link to be directed to the newly-created issue within your JIRA project.
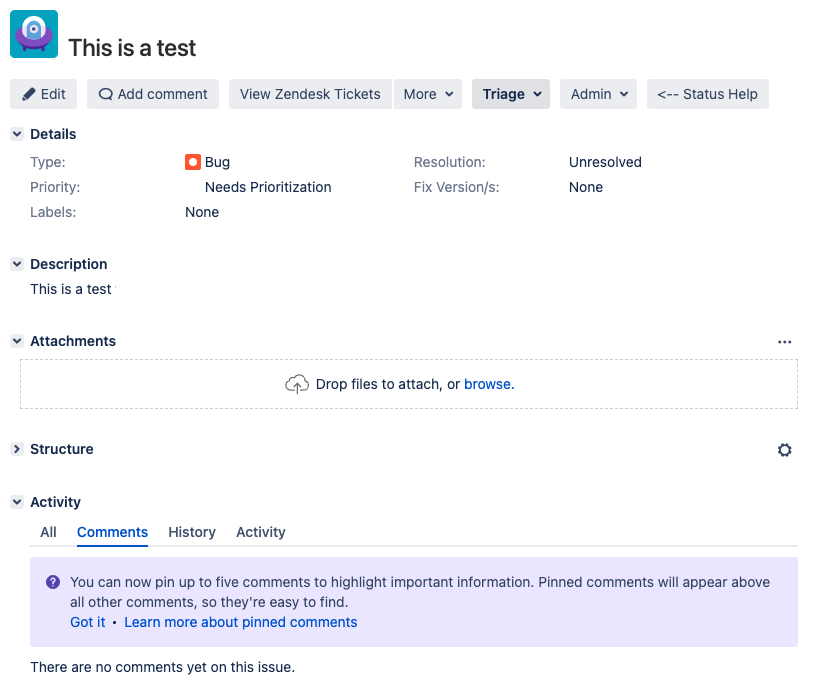
When finished, you can click the Disconnect Account button in the home tab to disconnect your app from your JIRA account.
Next steps
Congratulations! You've successfully customized your workspace with custom steps in Workflow Builder. Check out these links to take the next steps in your journey.
- To learn more about Bolt for Python, refer to the getting started documentation.
- For more details about creating workflow steps using the Bolt SDK, refer to the workflow steps for Bolt guide.
- For information about custom steps dynamic options, refer to custom steps dynamic options in Workflow Builder.