AI Chatbot
In this tutorial, you'll learn how to bring the power of AI into your Slack workspace using a chatbot called Bolty that uses Anthropic or OpenAI. Here's what we'll do with this sample app:
- Create your app from an app manifest and clone a starter template
- Set up and run your local project
- Create a workflow using Workflow Builder to summarize messages in conversations
- Select your preferred API and model to customize Bolty's responses
- Interact with Bolty via direct message, the
/ask-boltyslash command, or by mentioning the app in conversations
Prerequisites
Before getting started, you will need the following:
- a development workspace where you have permissions to install apps. If you don’t have a workspace, go ahead and set that up now — you can go here to create one, or you can join the Developer Program and provision a sandbox with access to all Slack features for free.
- a development environment with Python 3.6 or later.
- an Anthropic or OpenAI account with sufficient credits, and in which you have generated a secret key.
Skip to the code If you'd rather skip the tutorial and just head straight to the code, you can use our Bolt for Python AI Chatbot sample as a template.
Creating your app
- Navigate to the app creation page and select From a manifest.
- Select the workspace you want to install the application in.
- Copy the contents of the
manifest.jsonfile into the text box that says Paste your manifest code here (within the JSON tab) and click Next. - Review the configuration and click Create.
- You're now in your app configuration's Basic Information page. Navigate to the Install App link in the left nav and click *Install to Workspace, then Allow on the screen that follows.
Obtaining and storing your environment variables
Before you'll be able to successfully run the app, you'll need to first obtain and set some environment variables.
- On the Install App page, copy your Bot User OAuth Token. You will store this in your environment as
SLACK_BOT_TOKEN(we'll get to that next). - Navigate to Basic Information and in the App-Level Tokens section , click Generate Token and Scopes. Add the
connections:writescope, name the token, and click Generate. (For more details, refer to understanding OAuth scopes for bots). Copy this token. You will store this in your environment asSLACK_APP_TOKEN.
To store your tokens and environment variables, run the following commands in the terminal. Replace the placeholder values with your bot and app tokens collected above, as well as the key or keys for the AI provider or providers you want to use:
For macOS
export SLACK_BOT_TOKEN=<your-bot-token>
export SLACK_APP_TOKEN=<your-app-token>
export OPENAI_API_KEY=<your-api-key>
export ANTHROPIC_API_KEY=<your-api-key>
For Windows
set SLACK_BOT_TOKEN=<your-bot-token>
set SLACK_APP_TOKEN=<your-app-token>
set OPENAI_API_KEY=<your-api-key>
set ANTHROPIC_API_KEY=<your-api-key>
Setting up and running your local project
Clone the starter template onto your machine by running the following command:
git clone https://github.com/slack-samples/bolt-python-ai-chatbot.git
Change into the new project directory:
cd bolt-python-ai-chatbot
Start your Python virtual environment:
For macOS
python3 -m venv .venv
source .venv/bin/activate
For Windows
py -m venv .venv
.venv\Scripts\activate
Install the required dependencies:
pip install -r requirements.txt
Start your local server:
python app.py
If your app is up and running, you'll see a message that says "⚡️ Bolt app is running!"
Choosing your provider
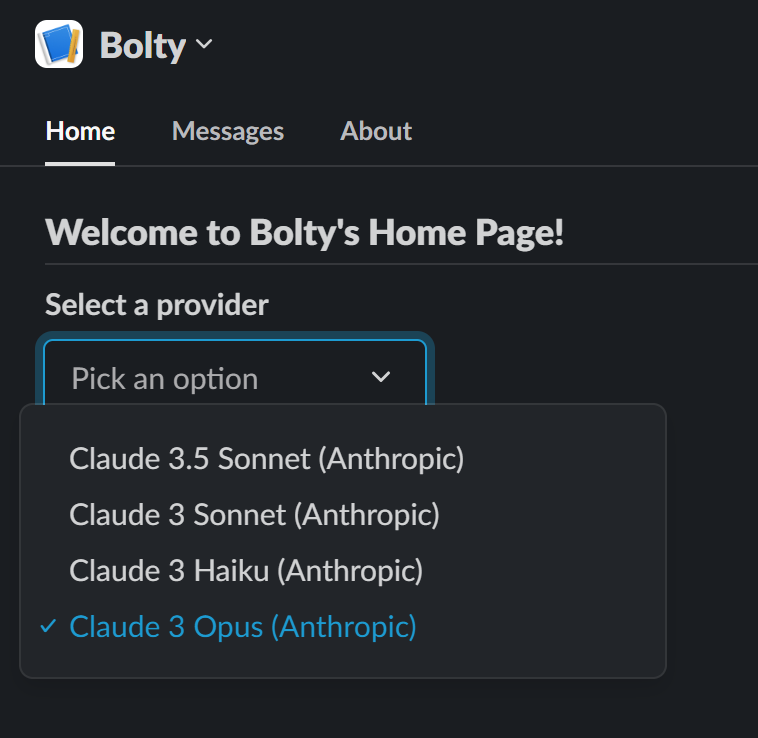
Navigate to the Bolty App Home and select a provider from the drop-down menu. The options listed will be dependent on which secret keys you added when setting your environment variables.
If you don't see Bolty listed under Apps in your workspace right away, never fear! You can mention @Bolty in a public channel to add the app, then navigate to your App Home.
Setting up your workflow
Within your development workspace, open Workflow Builder by clicking on your workspace name and then Tools > Workflow Builder. Select New Workflow > Build Workflow.
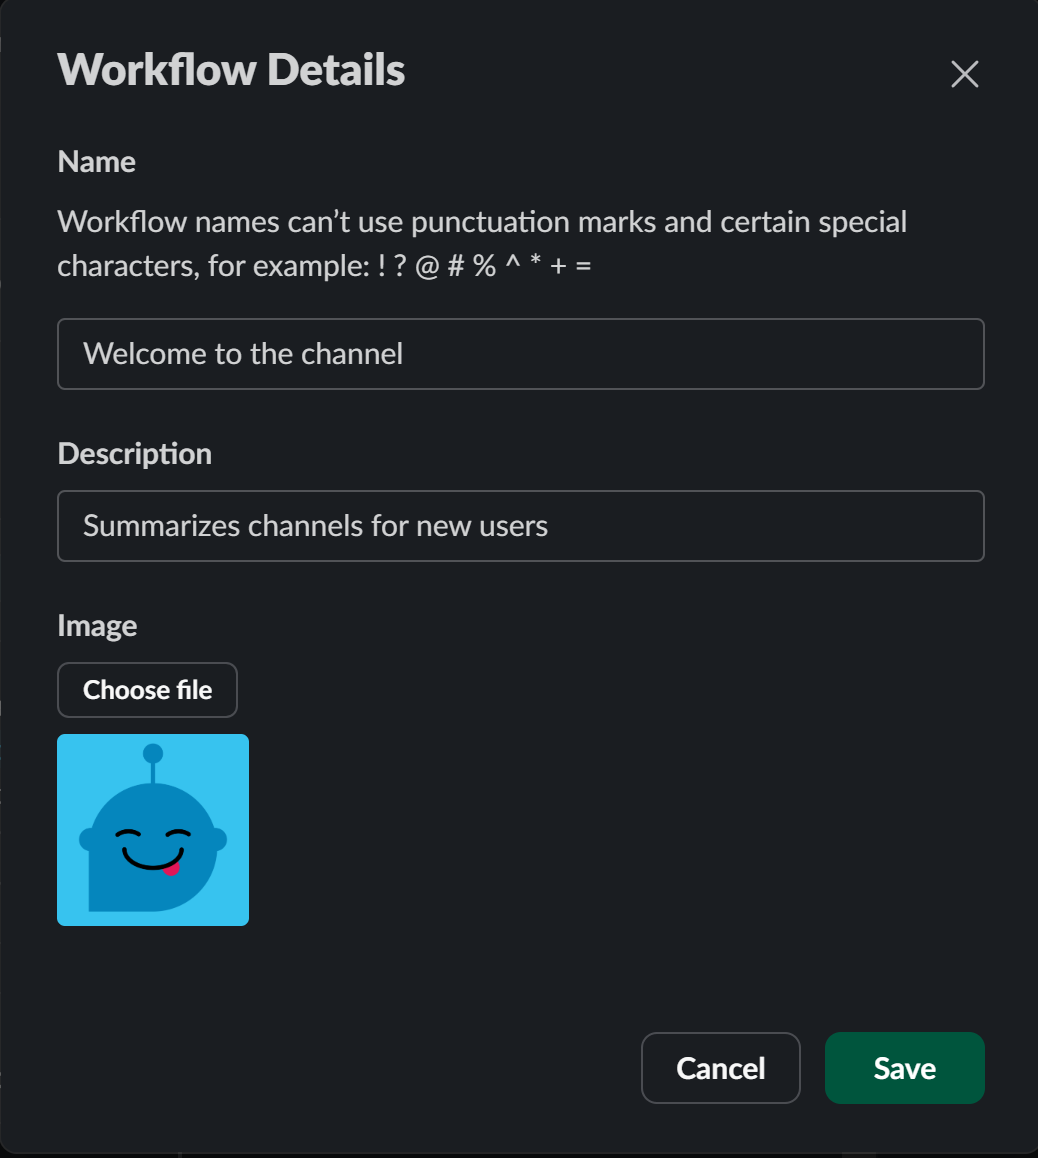
Click Untitled Workflow at the top to rename your workflow. For this tutorial, we'll call the workflow Welcome to the channel. Enter a description, such as Summarizes channels for new members, and click Save.
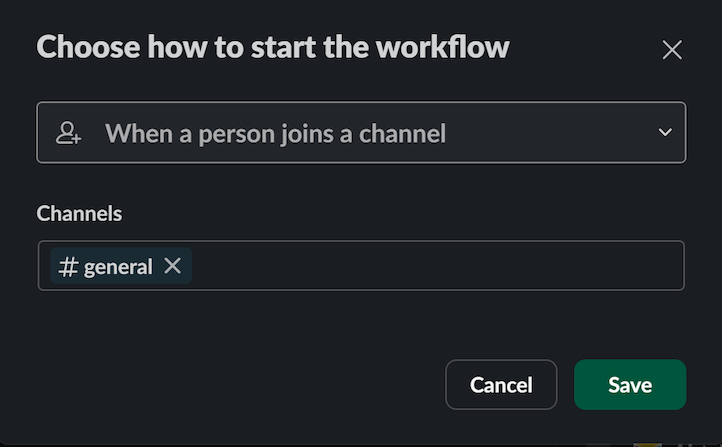
Select Choose an event under Start the workflow..., and then choose When a person joins a channel. Select the channel name from the drop-down menu and click Save.
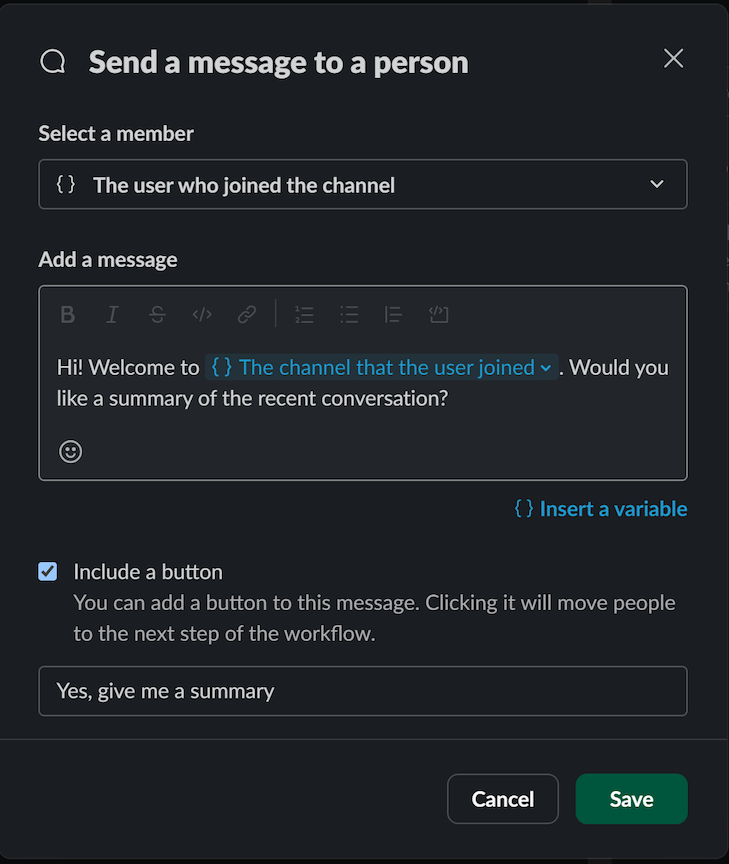
Under Then, do these things, click Add steps and complete the following:
- Select Messages > Send a message to a person.
- Under Select a member, choose The user who joined the channel from the drop-down menu.
- Under Add a message, enter a short message, such as Hi! Welcome to
{}The channel that the user joined. Would you like a summary of the recent conversation? Note that the{}The channel that the user joinedis a variable; you can insert it by selecting Insert a variable at the bottom of the message text box. - Select the Add Button button, and name the button Yes, give me a summary. Click Done.
We'll add two more steps under the Then, do these things section.
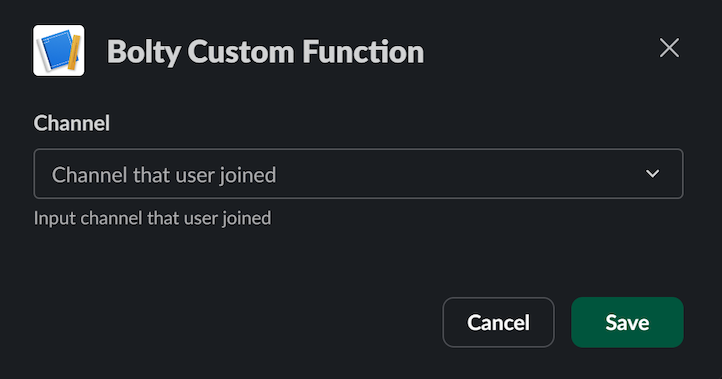
First, scroll to the bottom of the list of steps and choose Custom, then choose Bolty and Bolty Custom Function. In the Channel drop-down menu, select Channel that the user joined. Click Save.
For the final step, complete the following:
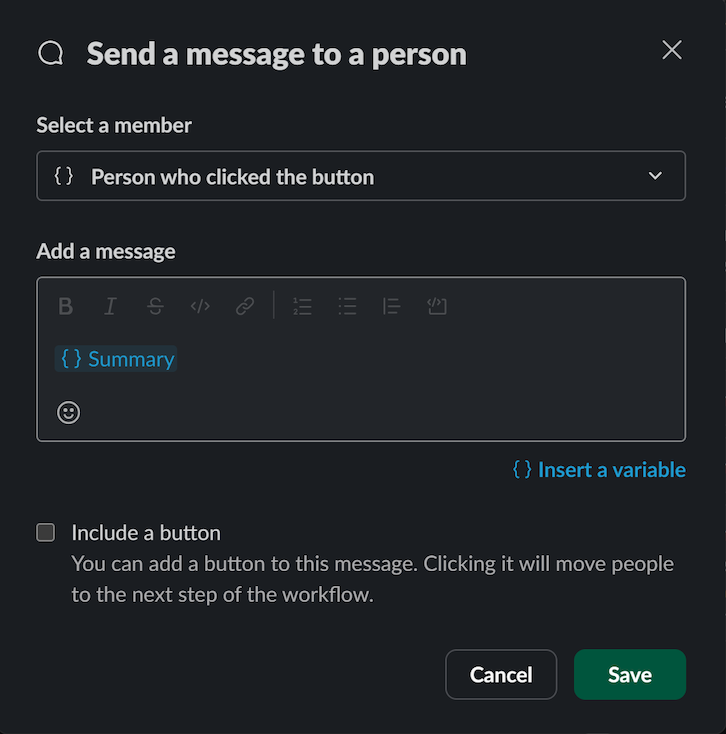
- Choose Messages and then Send a message to a person. Under Select a member, choose Person who clicked the button from the drop-down menu.
- Under Add a message, click Insert a variable and choose
{}Summaryunder the Bolty Custom Function section in the list that appears. Click Save.
When finished, click Finish Up, then click Publish to make the workflow available in your workspace.
Interacting with Bolty
Summarizing recent conversations
In order for Bolty to provide summaries of recent conversation in a channel, Bolty must be a member of that channel.
- Invite Bolty to a channel that you are able to leave and rejoin (for example, not the #general channel or a private channel someone else created) by mentioning the app in the channel — i.e., tagging @Bolty in the channel and sending your message.
- Slackbot will prompt you to either invite Bolty to the channel, or do nothing. Click Invite Them. Now when new users join the channel, the workflow you just created will be kicked off.
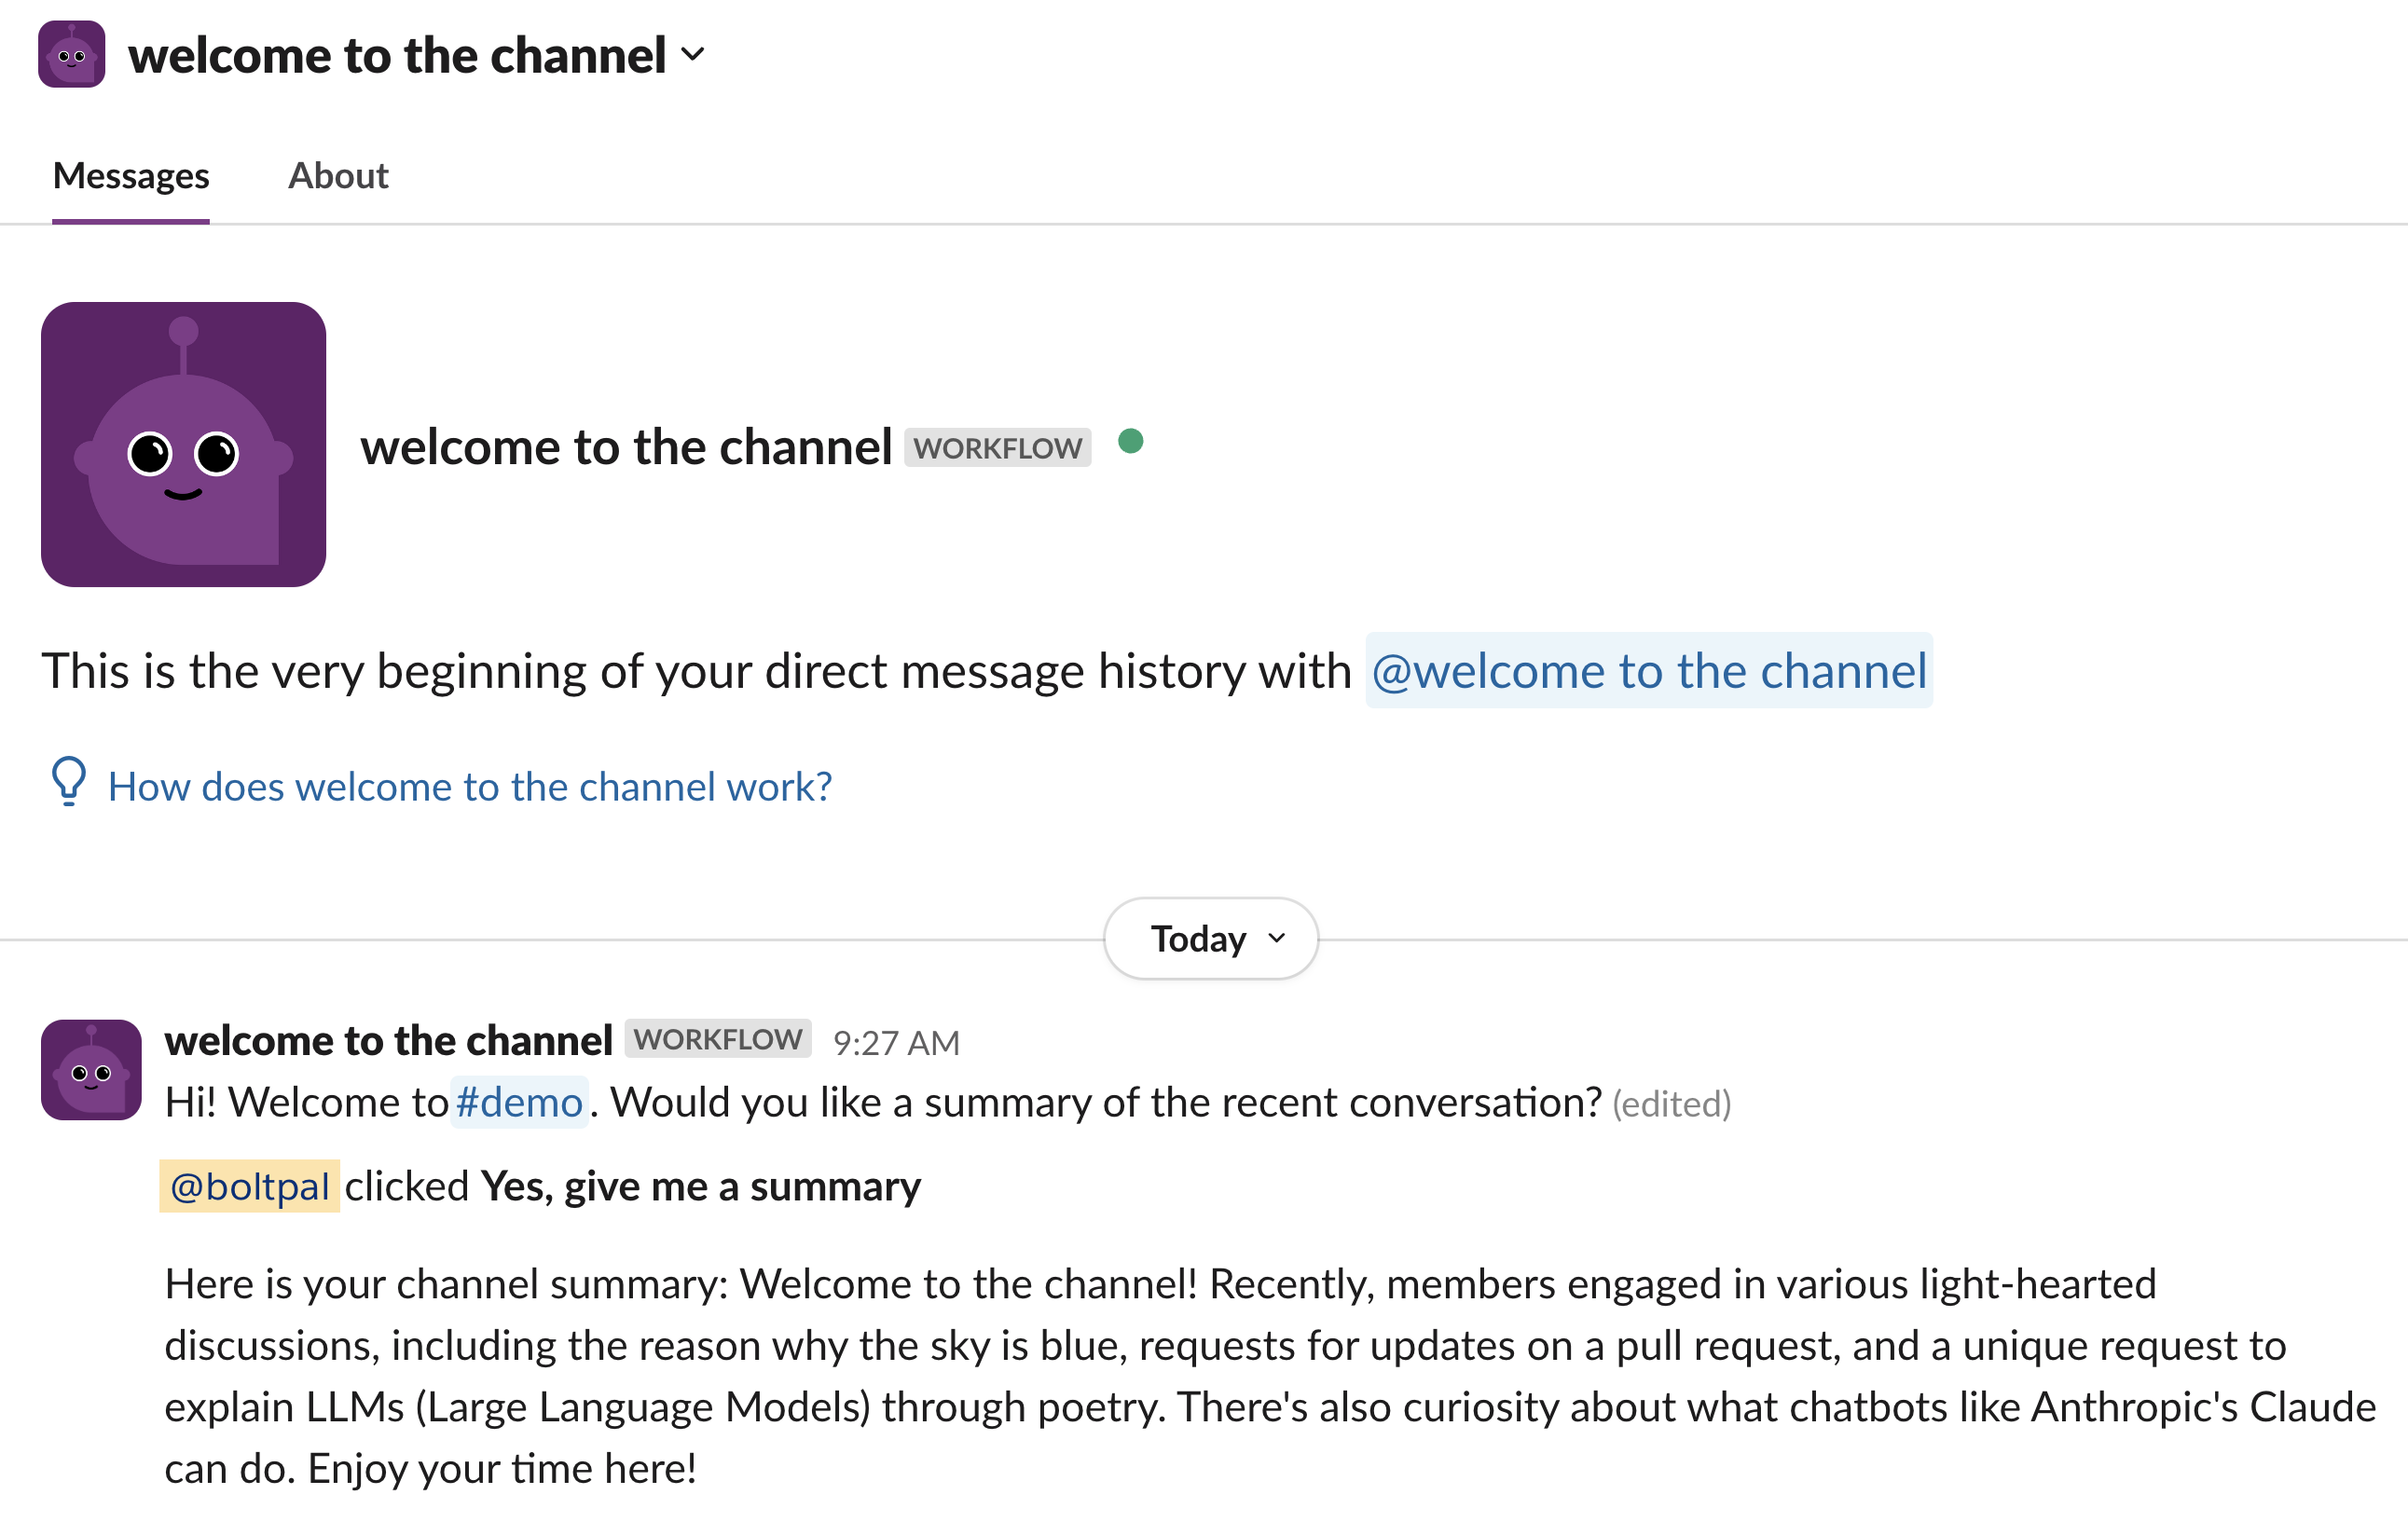
To test this, leave the channel you just invited Bolty to and rejoin it. This will kick off your workflow and you'll receive a direct message from Welcome to the channel. Click the Yes, give me a summary button, and Bolty will summarize the recent conversations in the channel you joined.
The central part of this functionality is shown in the following code snippet. Note the use of the user_context object, a Slack type that represents the user who is interacting with our workflow, as well as the history of the channel that will be summarized, which includes the ten most recent messages.
from ai.providers import get_provider_response
from logging import Logger
from slack_bolt import Complete, Fail, Ack
from slack_sdk import WebClient
from ..listener_utils.listener_constants import SUMMARIZE_CHANNEL_WORKFLOW
from ..listener_utils.parse_conversation import parse_conversation

"""
Handles the event to summarize a Slack channel's conversation history.
It retrieves the conversation history, parses it, generates a summary using an AI response,
and completes the workflow with the summary or fails if an error occurs.
"""

def handle_summary_function_callback(
    ack: Ack, inputs: dict, fail: Fail, logger: Logger, client: WebClient, complete: Complete
):
    ack()
    try:
        user_context = inputs["user_context"]
        channel_id = inputs["channel_id"]
        history = client.conversations_history(channel=channel_id, limit=10)["messages"]
        conversation = parse_conversation(history)

        summary = get_provider_response(user_context["id"], SUMMARIZE_CHANNEL_WORKFLOW, conversation)

        complete({"user_context": user_context, "response": summary})
    except Exception as e:
        logger.exception(e)
        fail(e)
Asking Bolty a question
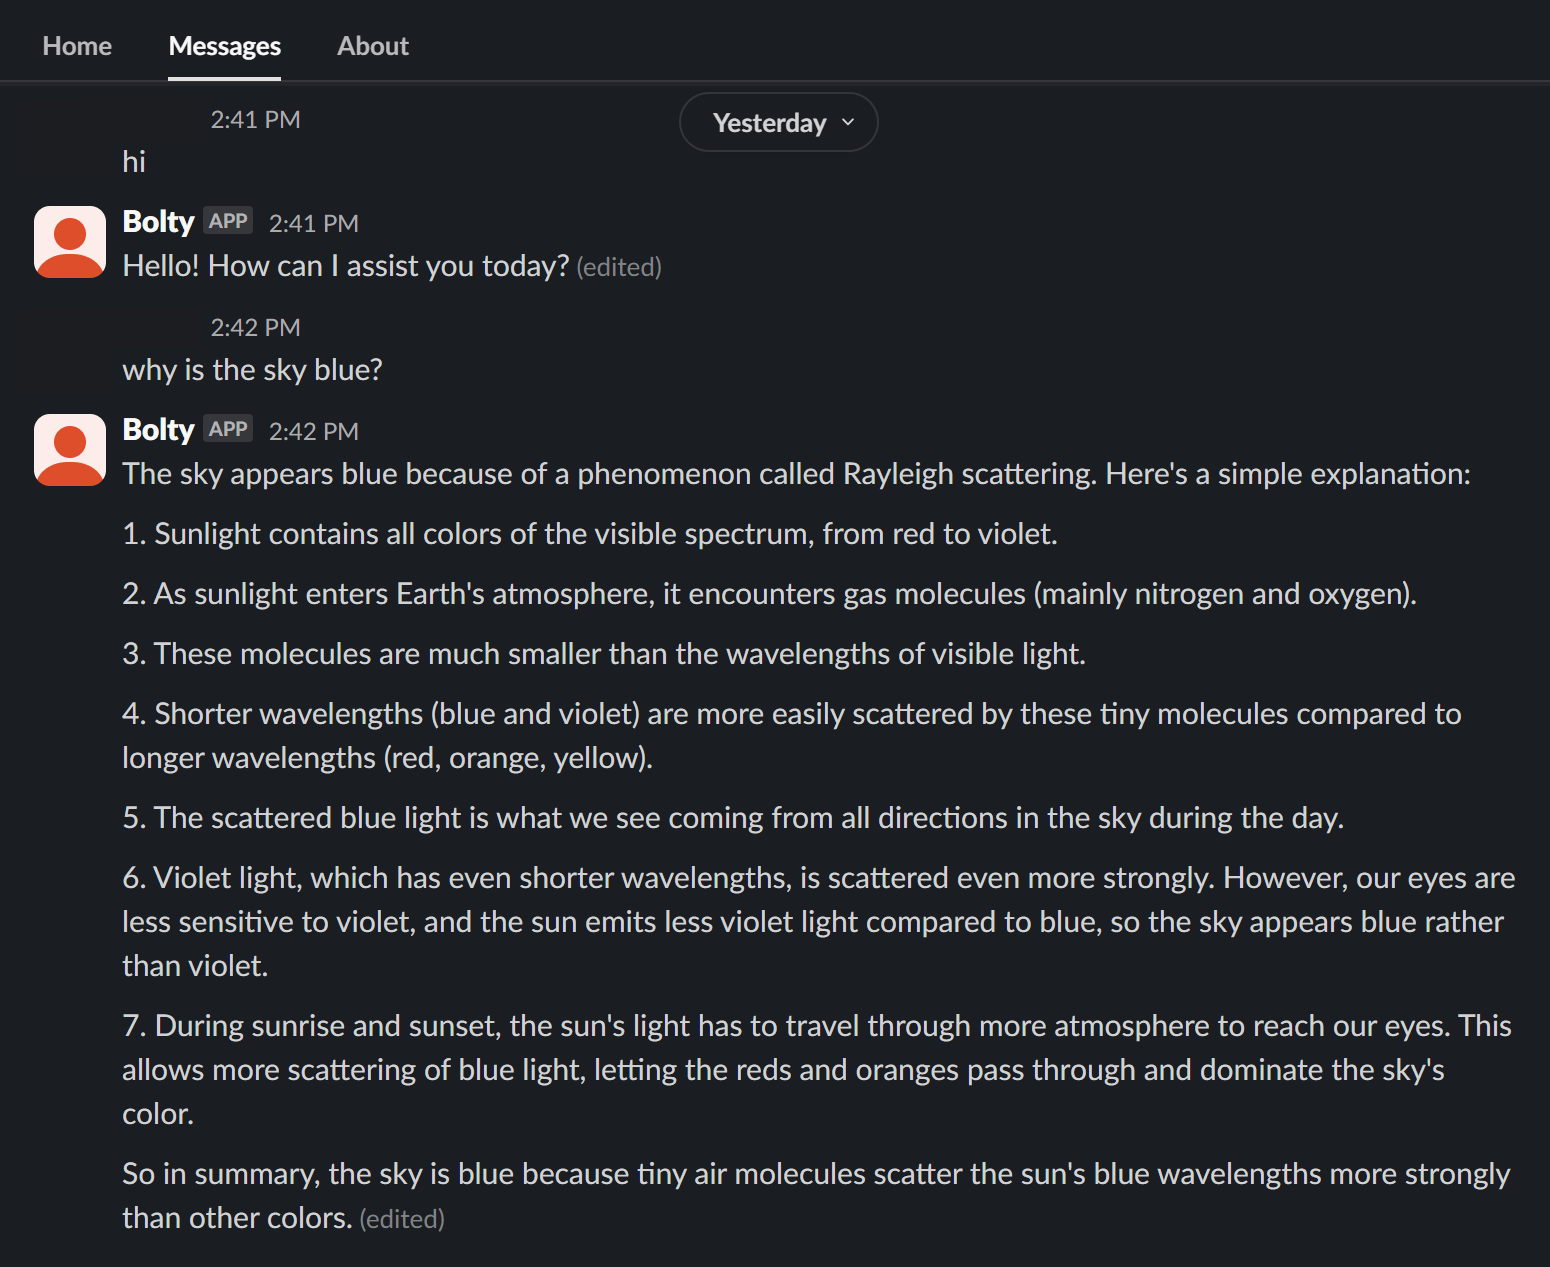
To ask Bolty a question, you can chat with Bolty in any channel the app is in. Use the \ask-bolty slash command to provide a prompt for Bolty to answer. Note that Bolty is currently not supported in threads.
You can also navigate to Bolty in your Apps list and select the Messages tab to chat with Bolty directly.
Next steps
Congratulations! You've successfully integrated the power of AI into your workspace. Check out these links to take the next steps in your Bolt for Python journey.
- To learn more about Bolt for Python, refer to the Getting started documentation.
- For more details about creating workflow steps using the Bolt SDK, refer to the workflow steps for Bolt guide.
- To use the Bolt for Python SDK to develop on the automations platform, refer to the Create a workflow step for Workflow Builder: Bolt for Python tutorial.